
- Photo
- Cloud Grey
- Mini Beige
- Made this
- 0 crocheters
- Skill level
- Beginner
- Hook size
- 5 mm
On this page
- Skill level
Beginner
Basic stitches only. Great as a first project.
- Use
Perfect Gift
About this pattern
This amigurumi kitten crochet pattern makes a chubby little cat with a red bow collar. The head and body are worked in one piece, starting from an oval base, so the shape comes together quickly.
You add four paws, two ears and a small tail, then embroider the nose, whiskers and pink paw pads. Use plush yarn with a 5 mm hook for a big cuddly cat, or thin yarn with a 2.5 mm hook for a tiny keychain-size kitten.
Why you'll love it
- Head and body in one piece
- Works with any yarn: plush for a big cat, thin yarn for a mini
- A simple chain-stitch collar you tie into a bow
Step progress photos
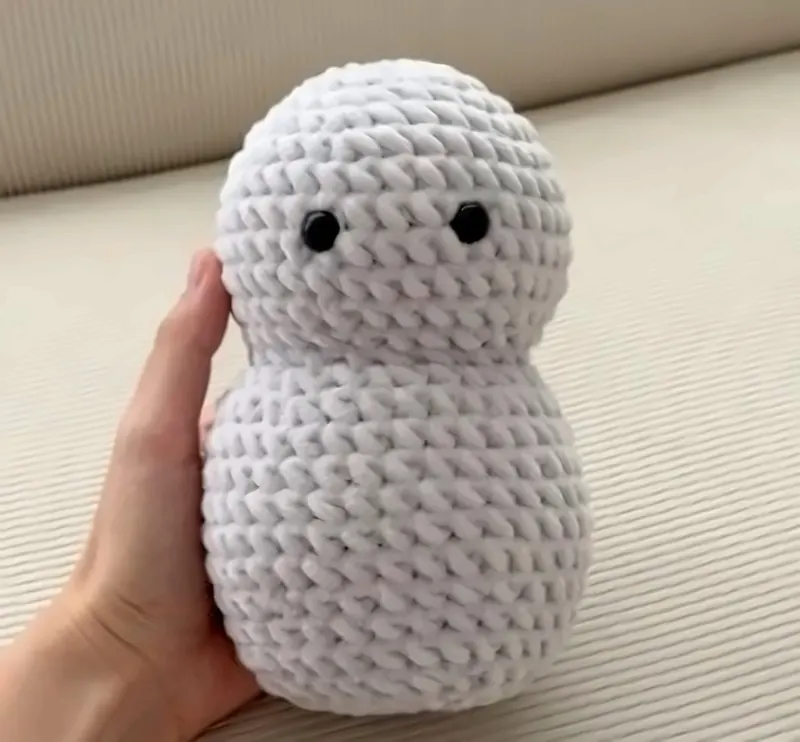
Body
Head and body finished, stuffed and closed.
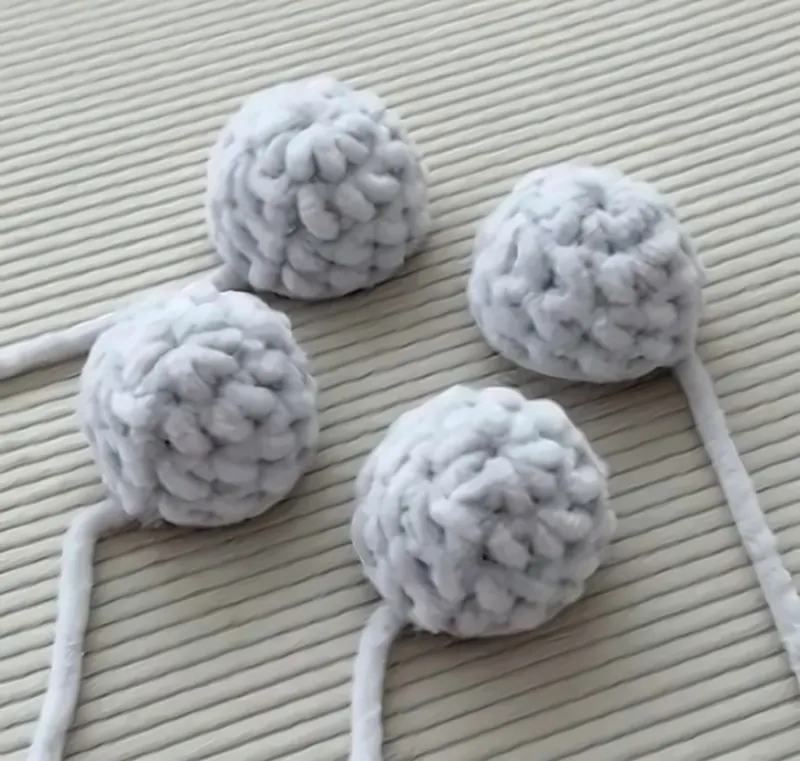
Paws
Four paws, lightly stuffed, with long tails for sewing.
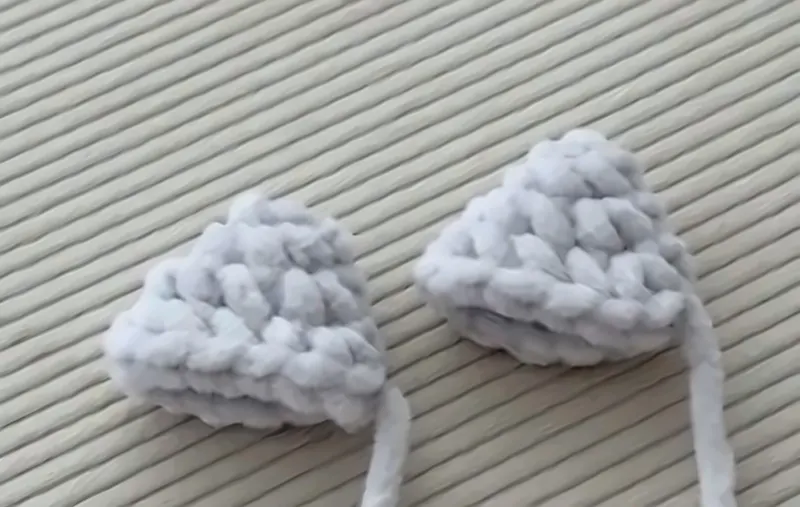
Ears
Two ears with tails left for sewing.
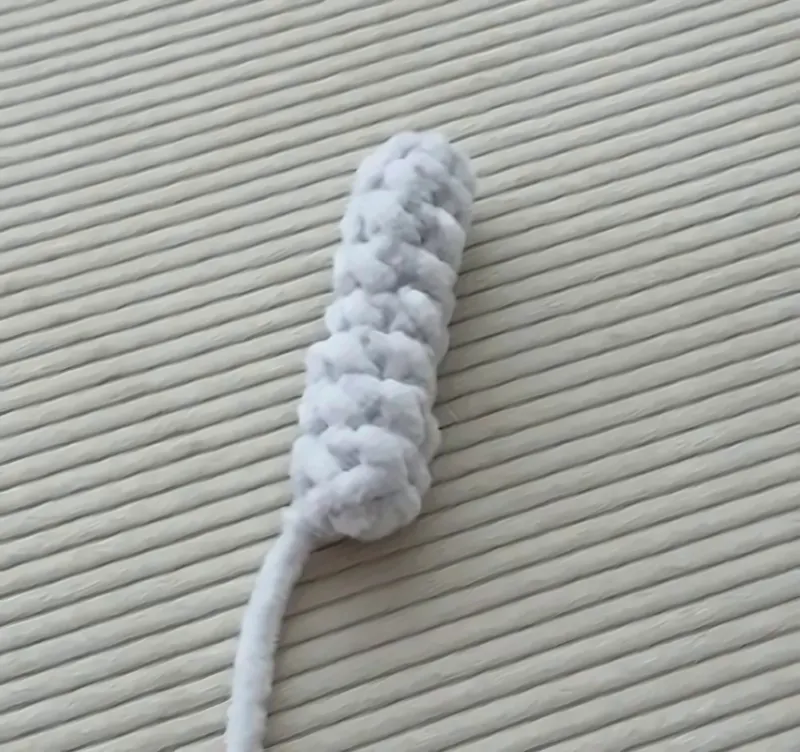
Tail
The tail is not stuffed.
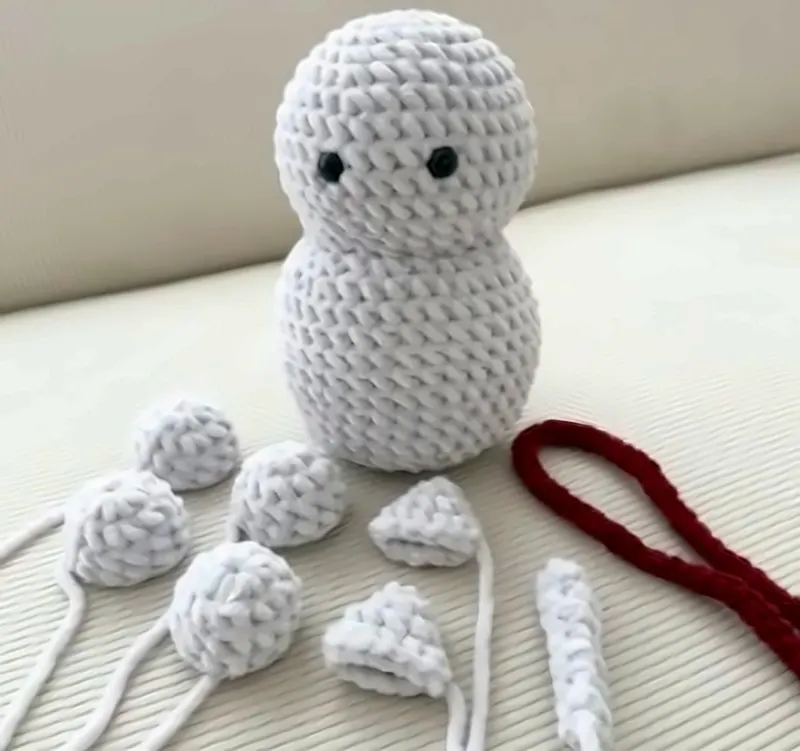
All parts
All the parts ready, with the collar chain.
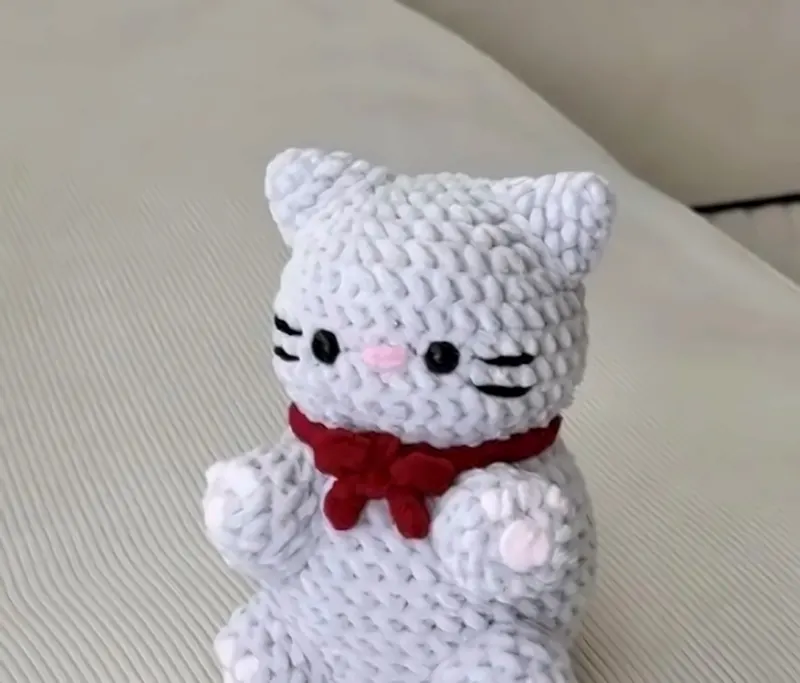
Finished
Nose, whiskers and pink paw pads embroidered.


Switch things up
Colour ideas:
- Cloud Grey
- Mini Beige
Materials needed
Yarn
- Main: Light grey (plush yarn)
- Collar: Red
- Details: Pink and black (for embroidery)
Tools
- Crochet hook to suit your yarn (5 mm for plush yarn, 2.5 mm for thin yarn)
- Safety eyes
- Fiberfill / stuffing
- Tapestry needle
- Stitch marker
- Scissors
Row counter
Row 0
Tap the circle after each row
The pattern
Head & Body
Worked in continuous rounds, starting from a chain.
Info: Insert the safety eyes between Rnds 8 and 9, 4 stitches apart. Start stuffing the kitten.
Info: Keep stuffing the body.
Info: Finish stuffing. Cut the yarn and close the opening.
Paws (make 4)
Info: Cut the yarn, leaving a long tail. Stuff lightly.
Ears (make 2)
Info: Cut the yarn, leaving a long tail.
Tail
Info: Cut the yarn, leaving a long tail for sewing. Do not stuff the tail.
Collar
Info: Leave a long tail at the end to secure the collar in place and tie a bow at the front. You can also use the starting tail of the chain to make tying easier.
Assembly
- 1
When all the parts are ready, sew them together to finish the kitten.
- 2
Tie the collar around the neck and make a bow at the front.
- 3
Last step: embroider the nose, whiskers and small pink details on the paws.
Important notes
- Tip: US crochet terms. Worked in continuous rounds; use a stitch marker.
- Tip: MR: magic ring. sc: single crochet. inc: 2 sc in the same st. dec: single crochet decrease. ch: chain. sl st: slip stitch. FLO: front loop only.
- Tip: Original pattern by @lau_crochetstudio, who also has a YouTube video showing how to sew the kitten together.
Pattern FAQ
What yarn can I use for this crochet kitten?
Any yarn works. Use plush yarn with a 5 mm hook for a big cuddly cat, or thin yarn with a 2.5 mm hook for a small kitten.
When do I put in the safety eyes?
Between Rnds 8 and 9, 4 stitches apart, before the head closes in.
Do I stuff the tail?
No. Stuff the paws lightly and leave the tail unstuffed.
Ratings & reviews
No reviews yet. Made it? Be the first to share how it went.
I made this!
Finished your Kitten with Bow? Share a photo and it may be featured in our Made-by-You gallery.
Free Amigurumi Kitten Crochet Pattern, © 2026 Sweety Dreamz. Source: https://sweetydreamz.com/patterns/amigurumi-kitten-crochet-pattern/. Please do not redistribute this pattern.

